What is XAVC?
XAVC is a recording format that was introduced by Sony on October 30, 2012. XAVC is an open format that will be licensed to companies that want to make XAVC products. XAVC uses level 5.2 of H.264/MPEG-4 AVC which is the highest level supported by that video standard. The new codec is geared toward 4k production but can still be found useful for 2k production.
Apple ProRes 422 is a standard-definition and high-definition lossy video compression format developed by Apple Inc. for use in post production. It was introduced in 2007 with Final Cut Studio 2 and is comparable to Avid's DNxHD codec which has the same purpose and uses similar bit rates. Both are DCT basedintra-frame-only codecs, and are therefore simpler to decode than distribution oriented formats like H.264. FCP 6/7, FCP X is Mac based editing software which supports transcoding Sony PMW-F55/Sony PMW-F5 XAVC to Apple ProRes for further editing.
XAVC Converter for Mac is a specially designed program to convert XAVC files to other common formats including ProRes MOV for FCP 7/6, with it, you can easily convert your XAVC recordings to ProRes MOV for edit XAVC with Final Cut Pro 7 or 6 with no problem. Besides, the converting speed is very fast and the output quality, good.

Free download the XAVC Video Converter below, the paragraphs below will show you how to import XAVC files to FCP 7
1. Import XAVC videos to the Converter
After installing and running the app, press "Add Files"button to import your XAVC recordings to the Converter; or directly drag and drop the files to the Mac software. Batch conversion is supported, you can add many files to the Convert at one time.
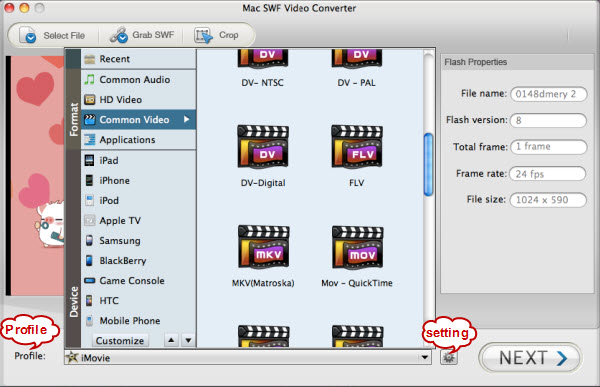
2. Choose output format
Hit format icon to select output format.
Optimized presets for Final Cut pro are supplied, you just need to go to Final Cut Pro column to select the one you prefer as output format.
3. Start to convert XAVC to ProRes for FCP
Finally, press Convert button to start transcoding XAVC files to ProRes MOV for FCP. a bar will show you the status of the conversion once you start the conversion. You can let the converter run on the background and when the conversion is done, you will be directed to open the folder where you saved the converted files, and then you can import them to FCP 7/6 to edit.